If ink mist still appears after installing a static eliminator, the issue is usually not that the device doesn’t work, but that the ink mist is not caused by static electricity, or the static eliminator is incorrectly selected, improperly installed, or inadequately covering the printing area.
A static eliminator does not completely remove static electricity—it neutralizes positive and negative ions to keep surface charge within a controllable range. When misused, it may have little effect or even worsen the problem.
Understanding how static is generated, identifying static-related ink mist, and properly selecting and installing a static eliminator are essential for achieving stable, high-quality printing.
Why Does Static Electricity Form During Printing?
A common misconception is that static electricity exists simply because the printer is not properly grounded. In reality, grounding alone cannot eliminate static electricity. Even a solid metal plate connected to ground cannot remove 100% of the surface charge.
Modern printers have complex mechanical structures. While frames, platforms, and components are electrically connected, they are not ideal conductors in a theoretical sense. Energy loss occurs during transmission, and static charge can still accumulate.
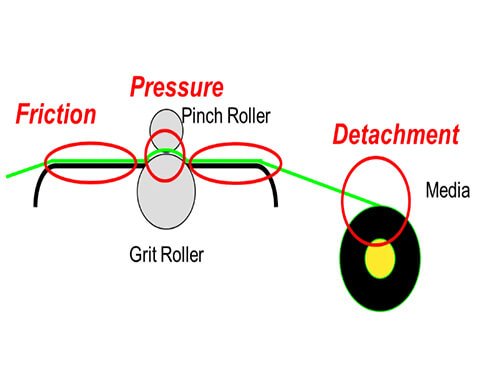
Static in printing mainly comes from friction—as media moves across the platen, passes between pinch and grit rollers, and unwinds from its core. Continuous movement and contact cause electrical charges to build up on the material surface, especially at higher speeds and with more insulating media.
How to Identify Ink Mist Caused by Static Electricity?
Ink mist caused by static electricity has distinct visual characteristics:
- Ink droplets scatter randomly with no clear pattern
- Mist appears around the printed image rather than following the nozzle paths
- In some cases, ink droplets cluster in localized areas due to uneven static distribution on the media surface
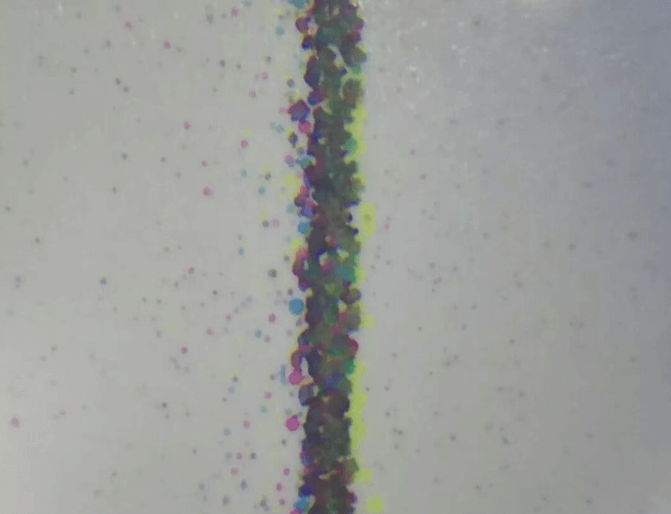
Ink Mist Caused by Static Electricity
This happens because charged ink droplets are deflected by electrostatic forces during flight.
After effective static neutralization, ink placement becomes clean and controlled, with little to no stray droplets visible.
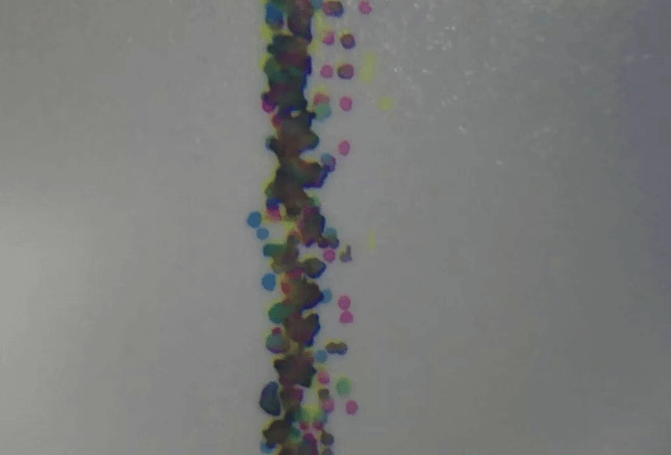
After eliminating static electricity
How Do Static Eliminators Actually Work?
A static eliminator does not “remove” static electricity directly. Instead, it releases balanced positive and negative ions to neutralize surface charge and bring the material into an electrically stable state.
Because of this working principle, improper energy output can reduce effectiveness:
- Output too weak → static is not fully neutralized
- Output too strong → excess ions may generate secondary static buildup
This is why simply installing a static eliminator does not guarantee results.
Correct Selection: Measuring Static Levels First
Before choosing a static eliminator, it is strongly recommended to use a static field meter to measure the actual charge level on the material surface.
For example, if testing shows a static level of approximately 5C, the eliminator should be set or selected to output ions at a similar level. Most industrial static eliminators allow fine adjustment through control knobs or settings.
Correct matching is the foundation of effective static control.
Proper Installation: Distance and Position Matter
Installation plays a critical role in performance. In most applications, the optimal installation distance is 3–10 cm from the material surface. Based on testing experience, 3–4 cm often provides the best results, although the ideal distance varies by brand and model and should be verified through testing.
It is essential to note that static electricity cannot be eliminated. The practical goal is to reduce surface charge to a controllable level—generally below 1C, where its impact on inkjet printing becomes negligible.
Bidirectional Printing: A Commonly Overlooked Issue
Most printers operate in bidirectional printing mode, but static eliminators are often installed on only one side of the carriage.
This can lead to inconsistent static neutralization between forward and reverse passes, resulting in visual defects such as banding or uneven density similar to light and dark passes.
Best practice: install static eliminators on both sides of the carriage to ensure balanced static control in both printing directions.
Final Thought
Ink mist is not always caused by static electricity, and static eliminators are not “plug-and-play” solutions. Accurate diagnosis, correct device selection, proper installation, and full coverage of the printing zone are all essential for effective static control.
When used correctly, static eliminators significantly improve print clarity, ink placement accuracy, and overall production stability.