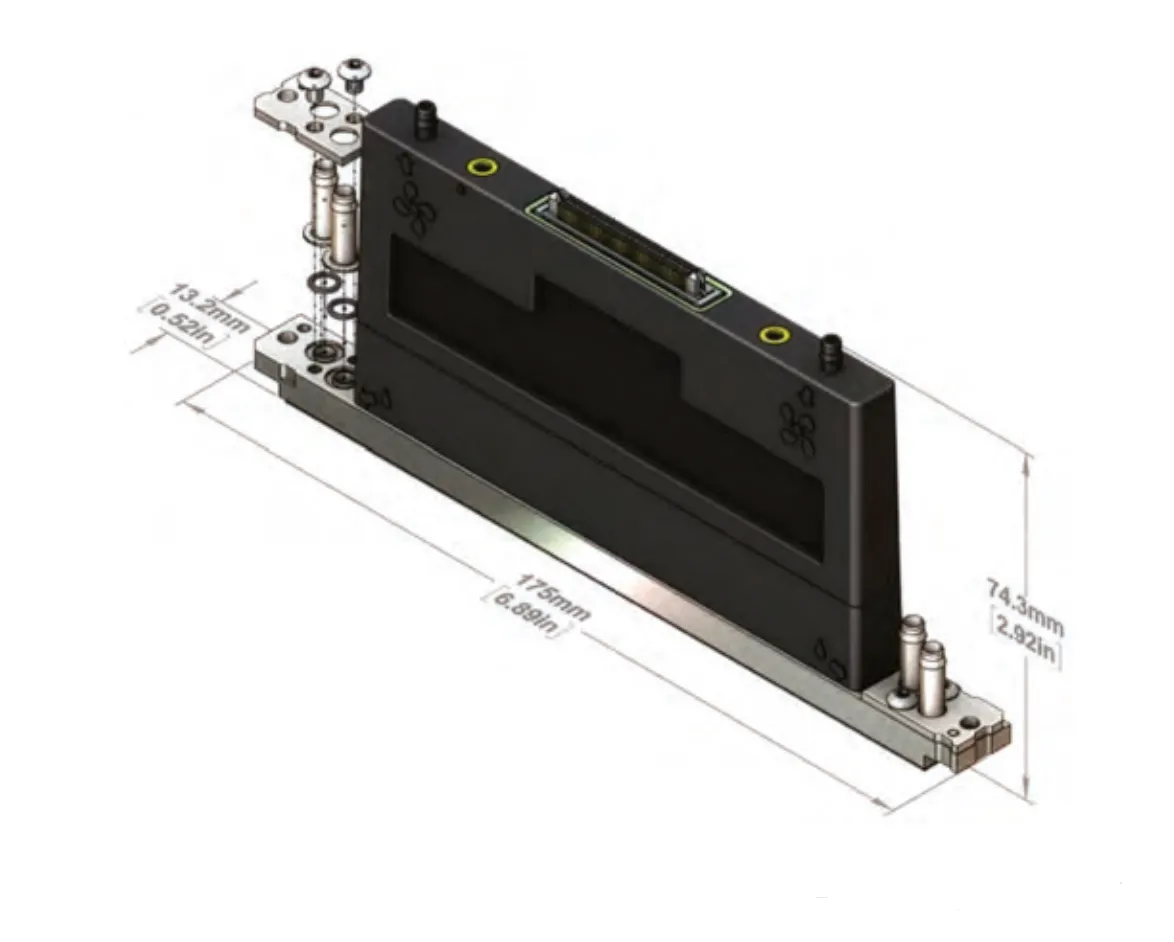
The Epson I3200-A1 printhead is widely used in photo machines and other industrial printing equipment. As a high-value core component, its performance directly affects print quality and production stability.
In the printing industry, even small operational mistakes or poor environmental control can lead to serious issues such as clogging, color missing, or banding. Therefore, proper usage, maintenance, and cleaning are essential to extend lifespan and reduce operating costs.
This guide combines key features, usage precautions, maintenance tips, and a safe cleaning method to help users fully understand how to protect the printhead.
Key Features of Epson I3200-A1 Printhead
PrecisionCore Technology
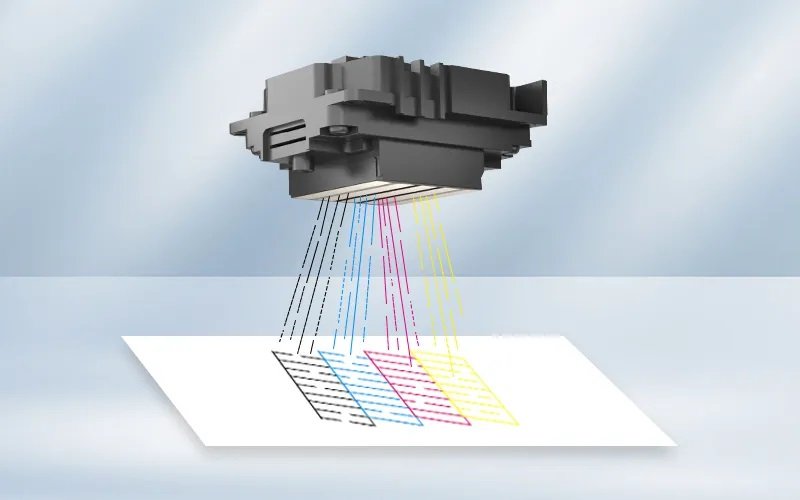
The Epson I3200-A1 is built with PrecisionCore technology, using an all-MEMS manufacturing process and thin-film piezoelectric elements.
Key advantages include:
- High-density nozzle layout (600 npi / 2 rows)
- Compact structure with fast printing speed
- High-precision ink placement
- Long service life
MEMS technology ensures ink droplets are close to perfect circles and accurately positioned, improving image sharpness and consistency.
Variable Droplet Technology (VSDT)
This printhead supports multi-level grayscale output.
Benefits:
- Flexible control of ink droplet size
- Reduced graininess in prints
- Smoother color transitions
- Better detail and saturation
High Resolution Output
- Supports up to 600 dpi per color
- Enables high-quality 4-color printing
Industrial Durability
Designed for long-term industrial use:
- Stable performance in high-speed printing
- Suitable for commercial production environments
- Strong durability and reliability
For model selection, read our Epson I3200 model selection guide.
Important Operating Precautions
Before Power Off
Follow the correct shutdown steps:
- Close the control software first
- Turn off the main power switch
- Ensure the carriage returns and seals properly on the capping station
When Replacing Capping Unit
- Use original or high-quality compatible parts
- If unused for more than 3 days, clean the capping station and waste ink tubes
- Prevent ink drying and nozzle blockage
During Operation
- Do NOT plug or unplug USB cables while the printer is powered on
- This may damage the mainboard
After Adding Ink
- Close ink tanks immediately after refilling
- Prevent dust or debris from entering the ink system
Preparation Before Use
To ensure stable operation and protect the printhead:
- Use original or manufacturer-recommended ink
- Install a voltage stabilizer for a stable power supply
- Properly connect the grounding wire to prevent static damage
Static electricity from dry environments or materials can damage precision electronic components.
Recommended Printer Maintenance Parts
To ensure stable printhead performance and prevent clogging, regular maintenance of key ink system components is essential.
We also supply reliable printer spare parts for stable production, including:
- Ink damper
- Ink filter
- Capping station
- Ink pump
- Ink tube
- Flat cable
- Cleaning liquid
Proper maintenance of these components helps reduce printhead failure rates and extend service life.
Cleaning and Maintenance Tips
Environment Control
- Temperature: 15–30°C
- Humidity: 35%–65%
Stable environmental conditions help extend printhead life.
Regular Maintenance
- Clean the wiper regularly to prevent ink buildup
- Keep the printing platform clean
- Remove ink stains, dust, and debris frequently
Epson I3200-A1 Printhead Cleaning Guide (Step-by-Step)
Print quality problems such as nozzle clogging, missing colors, deflected lines, and banding are common in water-based inkjet printing. For Epson I3200-A1 printheads, using the correct cleaning process is essential to restore stable ink flow and protect the printhead from permanent damage.
This guide explains how to clean an Epson I3200-A1 printhead using a water-based printhead cleaning solution.
Why Proper Cleaning Is Important
The Epson I3200-A1 printhead contains precision nozzles and internal ink channels. Incorrect cleaning may cause:
- Permanent nozzle blockage
- Damaged internal diaphragm
- Ink system contamination
- Chemical reaction from the wrong cleaning fluid
- Shortened printhead lifespan
For best results, always use the correct cleaning solution according to the ink type.
Important Warning Before Cleaning
The cleaning solution must match the ink type.
UV ink → UV cleaning fluid
Eco-solvent ink → eco-solvent cleaning fluid
Water-based ink → water-based cleaning / unclogging fluid
Never mix different cleaning fluids. Mixing incompatible liquids may cause coagulation inside the printhead and permanently damage the nozzle channels.
This guide is mainly for Epson I3200-A1 printheads used with water-based ink systems.
Tools Required
Prepare the following tools before cleaning:
- Water-based printhead unclogging fluid
- Purified water or distilled water
- 30–50 ml syringe
- Clean waste liquid container
- Dust-free cloth
- Moisturizing fluid, if the printhead will not be used immediately
Make sure the working area is clean and free from dust.
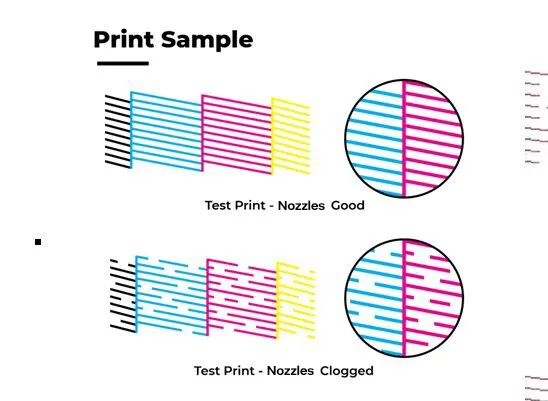
Step 1: Print a Nozzle Test First
Before removing the printhead, print a nozzle test pattern.
Check which ink channel has clogging, missing lines, deflected spraying, or banding. Remember the problematic channel clearly before starting the cleaning process.
This step is important because only the blocked or abnormal channels need deep unclogging treatment. Channels without clogging do not need to be filled with unclogging fluid.
Step 2: Remove the Printhead Safely
Turn off the printer completely.
Disconnect the ink tubes and cables carefully.
Remove the printhead from the printer.
Place the printhead on a clean surface.
Put a clean container underneath to collect waste liquid.
Open one ink inlet of the printhead and seal the other inlet properly. This helps control the cleaning direction and prevents liquid from flowing into the wrong path.
Step 3: Pre-Flush with Purified or Distilled Water
Use a syringe to draw purified water or distilled water.
Inject the water slowly from one ink inlet into each channel of the printhead. The purpose of this step is to wash out the remaining ink inside the printhead before using the unclogging fluid.
Continue flushing until the liquid coming out of each channel becomes clear and transparent.
Do not use strong pressure. Push the syringe slowly and evenly to avoid damaging the internal structure of the printhead.
Step 4: Blow Air to Empty the Remaining Liquid
After flushing with water, use the syringe to push clean air through the channels several times.
This helps remove the remaining water inside the printhead. Repeat this step until no visible liquid comes out.
After the liquid is drained, immediately wipe the nozzle surface gently with a dust-free cloth.
Do not rub the nozzle surface aggressively.
Step 5: Inject Water-Based Unclogging Fluid into the Blocked Channel
Use another clean syringe to draw 30–50 ml of water-based printhead unclogging fluid.
Inject the unclogging fluid only into the channel that showed clogging, deflected spraying, or missing lines during the nozzle test.
Let the unclogging fluid enter from the ink inlet and flow out through the drain tube or nozzle area.
Some liquid may spray out from the normal nozzle holes. This is normal. However, channels without clogging do not need to be treated with unclogging fluid.
Step 6: Deep Cleaning for Severe Clogging
If the blockage is serious, pour a suitable amount of unclogging fluid into a clean tray.
Place the nozzle surface of the printhead into the liquid for soaking. Do not immerse the circuit board, cable port, or electronic parts.
After soaking, repeat the injection cleaning process until the clogged channel becomes smoother.
This step helps soften dried ink inside the nozzle area.
Step 7: Check the Nozzle Waterline
After unclogging, block the drain tube and gently press the unclogging fluid through the channel.
Observe whether the liquid line sprayed from the nozzle surface is complete and even.
If the water line is continuous and stable, the channel is usually recovered. If the spray is still broken or uneven, repeat the unclogging process carefully.
Step 8: Drain the Liquid Again
Use the syringe to push air through each cleaned channel several times.
Make sure all remaining liquid is fully discharged from the printhead.
After draining, wipe the nozzle surface immediately with a clean, dust-free cloth.
Keeping the nozzle surface dry and clean helps prevent secondary contamination.
Step 9: Reinstall or Store the Printhead Properly
After cleaning, there are two options:
If the printhead will be used immediately, reinstall it and refill the ink system. Then run ink loading and print a nozzle test.
If the printhead will not be used immediately, inject moisturizing fluid into the printhead to keep the nozzle channels wet. This prevents the nozzles from drying out during storage.
Never leave the cleaned printhead empty and dry for a long time.
How to Check Cleaning Result
A properly cleaned printhead shows:
- Clear and transparent waste liquid
- No visible ink residue
- Smooth and stable flow
Common Mistakes to Avoid
- Using excessive pressure during flushing
- Mixing cleaning solutions
- Long soaking
- Using dirty containers
These mistakes may permanently damage the printhead.
Final Conclusion
The Epson I3200-A1 printhead can deliver stable, high-quality performance when properly used and maintained.
Key benefits of correct operation:
- Stable print quality
- Reduced clogging risk
- Longer printhead lifespan
- Lower maintenance cost
Proper usage habits, environmental control, and correct cleaning methods are essential to ensure long-term, reliable printing performance.
FAQs
No. Alcohol damages internal components.
Yes. Apply protective liquid and store the printhead in a sealed, dust-free environment.